
Enabling SSL Certificate on Hostgator Using WordPress is so easy. Just follow the steps I created below.
If you want your website to be secured, use an SSL Certificate.
SSL certificates is used to activate the padlock and https protocol on your website. If your website is using WooCommerce, I suggest to you to secure it by buying SSL Certificate. SSL is commonly used for security when using credit card transactions, data transfer and logins, and for securing your website.
It is not only needed to make your setting https. Makes it sure you bought SSL Certificates and activated it on your website.
So, on my end, I bought the SSL Certificate but haven’t activated yet.
To know if your SSL Certificates is activated, your website should have the padlock icon on the URL address of the browser when you enter your domain name.
To Check using your Hostgator account, please follow the instruction below.
1.) Logon to your hostgator cpanel.
2.) On the hosting package, then go to manage, then click Manage Page.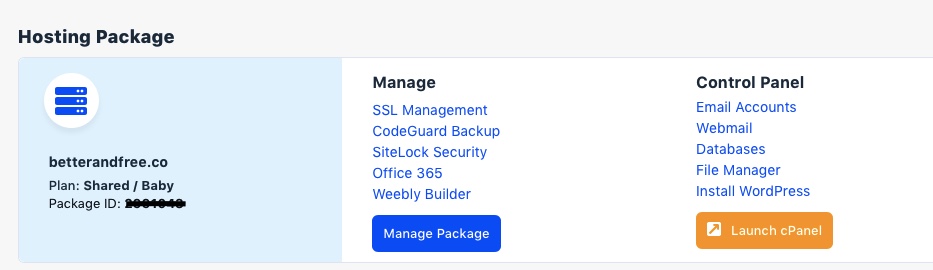
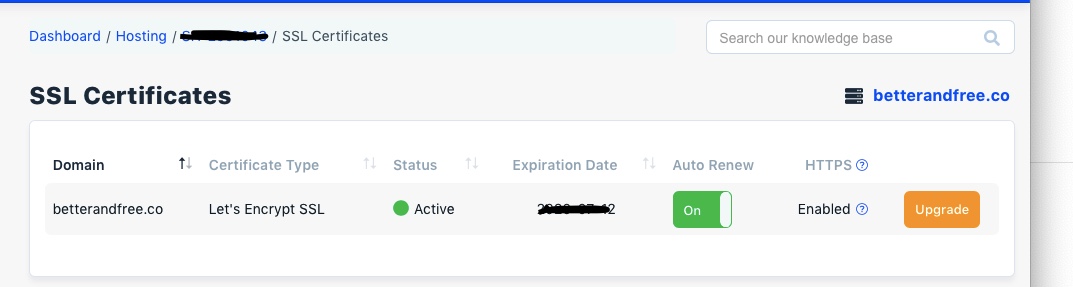
3.) Go to [Secure | https], then click Manage.

4.) Then click the refresh icon below the HTTPS label. Once it is enabled that means your website is already secured.
If the HTTPS is disabled, the easiest way to do is to contact Hostgator Support. You need to enter your name, email address, your hosting package, your password. Please select technical support, then enter your concern which is “SSL Certificates Disabled”. During the chat they will ask you of your domain name and your PIN to make your SSL Certificate enabled.
On my end, I need to reset the PIN with the help of the technical support. Then after the process, my site becomes secured with the padlock icon. I am now ready to sell my digital products online.
![]()
